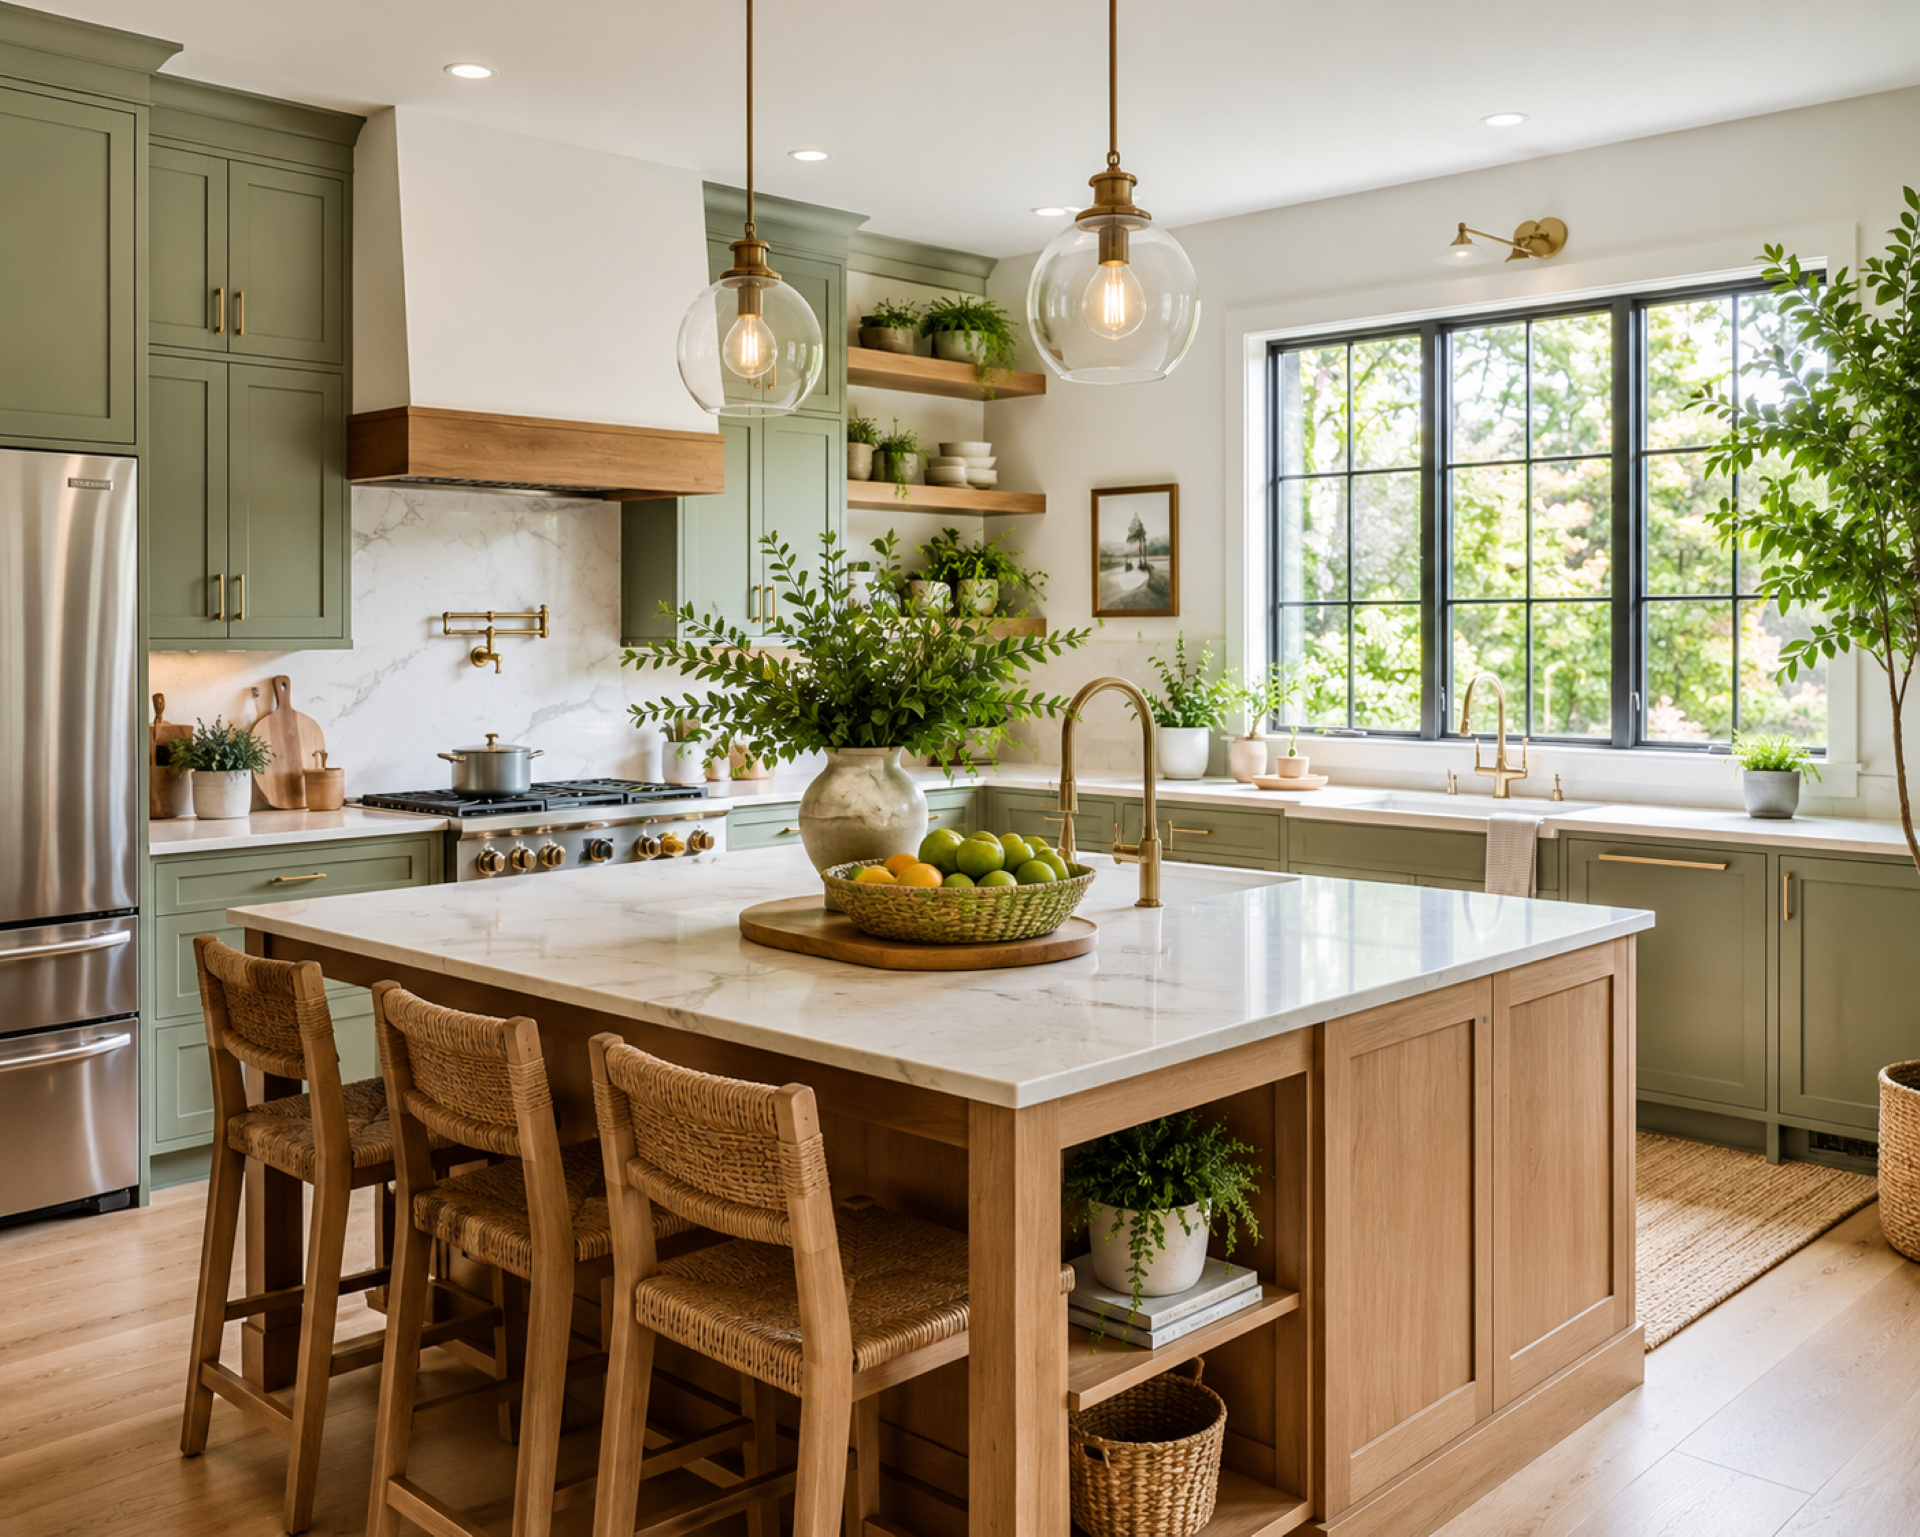
If you’ve been scrolling through Pinterest or flipping through interior design magazines lately, you’ve probably noticed one color dominating kitchen trends: sage green. This soft, muted green with gray undertones has become the darling of home design—and for good reason. It’s calming, versatile, and pairs beautifully with everything from warm brass to sleek stainless steel.
As a home design enthusiast who has personally renovated three kitchens (on a tight budget, I might add), I can tell you that transforming your kitchen with sage green kitchen cabinet paint is one of the most impactful and cost-effective upgrades you can make. Whether you’re a seasoned DIYer or a beginner with a paintbrush, these five budget-friendly ideas will inspire your next project.
In this guide, I’ll walk you through five distinct kitchen styles—each achievable without breaking the bank—complete with real visual references to spark your creativity. Let’s dive in.
Why Choose Sage Green Kitchen Cabinets?
Before we explore the designs, let’s talk about why sage green deserves a spot in your kitchen.
Psychological Benefits: Sage green is associated with nature, tranquility, and balance. In a space where you start your mornings and gather with family, this color creates an inherently calming atmosphere.
Versatility: Unlike bolder greens, sage is a neutral-leaning hue. It works with warm wood tones, cool marble, industrial metals, and rustic textures alike.
Resale Value: According to real estate experts, green kitchens are increasingly popular with buyers. A Zillow study found that homes with green kitchens sold for higher prices than expected—making this a smart investment.
Budget-Friendly: Painting existing cabinets costs a fraction of full replacement. With proper prep, quality paint, and a weekend of work, you can achieve a magazine-worthy look for under $300.
1. Modern Contemporary Sage Green Kitchen
The Vision
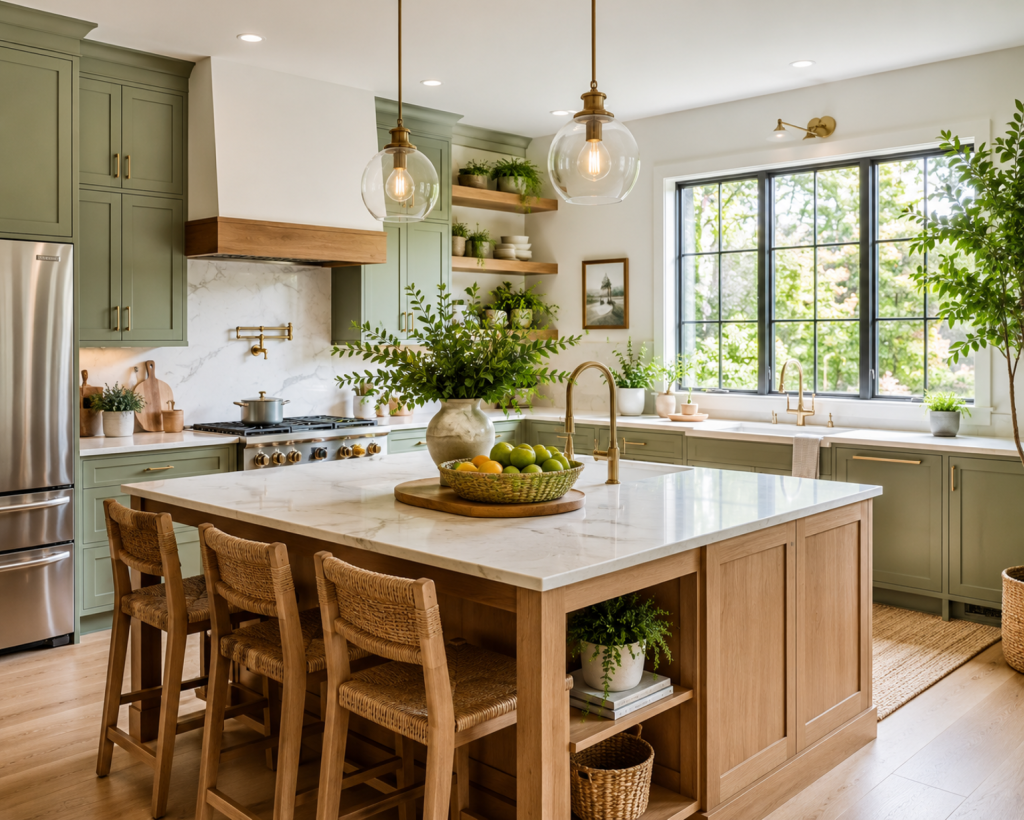
This design embodies clean lines, bright spaces, and a harmonious blend of natural materials. The sage green kitchen cabinet pairs with white marble-look countertops, light oak accents, and brass hardware for a timeless yet current aesthetic.
Key Features
- Cabinet Style: Shaker-style doors with simple recessed panels
- Hardware: Minimalist brass pulls and knobs
- Countertops: White quartz or laminate with subtle veining
- Lighting: Glass globe pendant lights with brass fixtures
- Accents: Open wooden shelving, potted herbs, and natural fiber bar stools
DIY Budget Breakdown
| Item | Estimated Cost |
|---|---|
| Cabinet paint (sage green) | $80-120 |
| Primer | $25-35 |
| Sandpaper & supplies | $20-30 |
| Brass hardware (25 pieces) | $60-100 |
| Total | $185-285 |
Pro Tips from Experience
When I painted my first set of cabinets in this style, I learned that preparation is everything. Remove all hardware, clean with degreaser, sand lightly, and apply a high-quality bonding primer. For the sage green color, look for shades like Benjamin Moore’s “Saybrook Sage” or Sherwin-Williams’ “Clary Sage.” Both offer that perfect muted tone without reading too yellow or too blue.
Expert Tip: If your cabinets are currently a dark wood or laminate, use a shellac-based primer to prevent bleed-through. This extra step adds $15 but saves hours of frustration.
2. Shabby Chic Sage Green Kitchen

The Vision
Shabby chic is all about romantic, lived-in charm. Think distressed finishes, floral patterns, vintage dishware, and a soft, dreamy palette. The sage green kitchen cabinet in this style takes on a weathered, antiqued appearance that tells a story.
Key Features
- Cabinet Style: Glass-front upper cabinets with mullions, solid lower cabinets
- Finish: Distressed or “chalk-painted” look with visible wear on edges
- Hardware: Vintage-style ceramic knobs or antique brass pulls
- Textiles: Floral curtains, lace-trimmed sink skirts, and upholstered chair cushions
- Decor: China displays, fresh flowers in ceramic pitchers, and vintage linens
DIY Budget Breakdown
| Item | Estimated Cost |
|---|---|
| Chalk paint (sage green) | $40-60 |
| Clear wax or matte sealant | $15-25 |
| Sandpaper & distressing tools | $15-20 |
| Vintage hardware (thrifted/online) | $30-50 |
| Floral fabric for accents | $20-40 |
| Total | $120-195 |
Pro Tips from Experience
The beauty of shabby chic is that imperfection is the goal. I achieved this look using chalk paint, which requires no priming on most surfaces. After painting, I lightly sanded the edges and corners where natural wear would occur. Then I applied clear wax for protection.
Expert Tip: Source your hardware from estate sales, Etsy, or Habitat for Humanity ReStores. Mismatched vintage knobs add authentic character that new hardware simply can’t replicate. For the sink skirt, sew a simple panel with a tension rod—no advanced sewing skills required.
Color Recommendation: For shabby chic, choose a lighter, more muted sage—almost a mint-sage hybrid. This keeps the space feeling airy and bright.
3. Rustic Sage Green Kitchen
The Vision
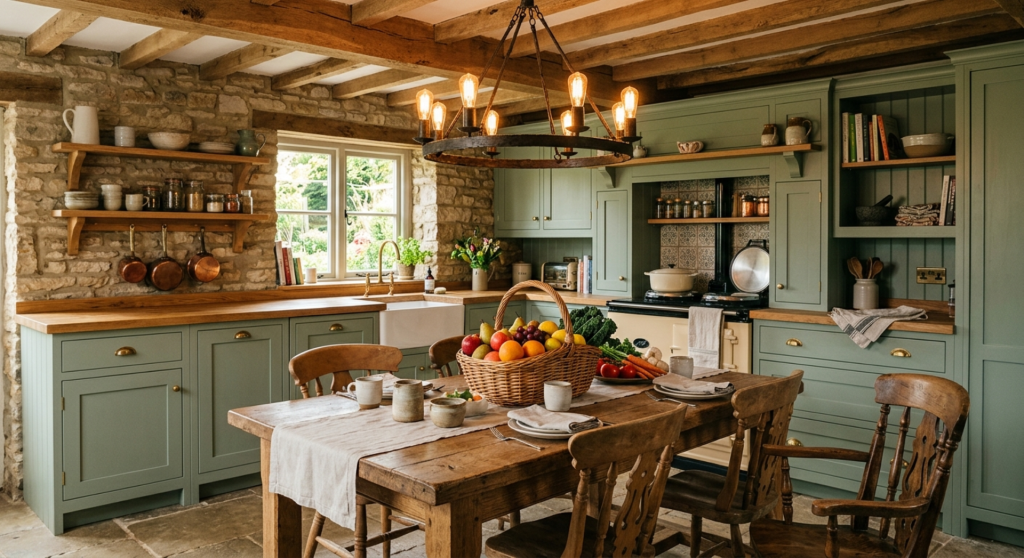
Rustic design celebrates natural materials, exposed textures, and a connection to the countryside. This kitchen features sage green kitchen cabinet units paired with raw stone walls, exposed wooden ceiling beams, and hearty farmhouse furniture.
Key Features
- Cabinet Style: Traditional raised panel or beadboard doors
- Countertops: Butcher block or reclaimed wood
- Walls: Exposed stone or brick (or faux alternatives)
- Lighting: Wrought iron or aged metal chandeliers with Edison bulbs
- Flooring: Natural stone tiles or wide-plank hardwood
DIY Budget Breakdown
| Item | Estimated Cost |
|---|---|
| Cabinet paint (sage green) | $80-120 |
| Butcher block countertop (IKEA/Lumber) | $150-300 |
| Wrought iron chandelier (secondhand) | $50-100 |
| Stone veneer (accent wall) | $100-200 |
| Total | $380-720 |
Pro Tips from Experience
Rustic style is forgiving—rough edges and handmade qualities are celebrated. I installed a butcher block countertop from a big-box store and finished it with food-safe mineral oil. The warmth of the wood against the cool sage green creates a beautiful tension.
Expert Tip: If exposed stone isn’t in your budget, consider a limewash paint technique on one wall. Mix paint with plaster or use a specialized limewash product to create texture. For the ceiling beams, faux beams made from hollow wood boxes are surprisingly affordable and easy to install.
Hardware Selection: Opt for hammered copper or aged bronze hardware. These metals develop a natural patina over time, enhancing the rustic aesthetic.
4. Mid-Century Modern Sage Green Kitchen
The Vision
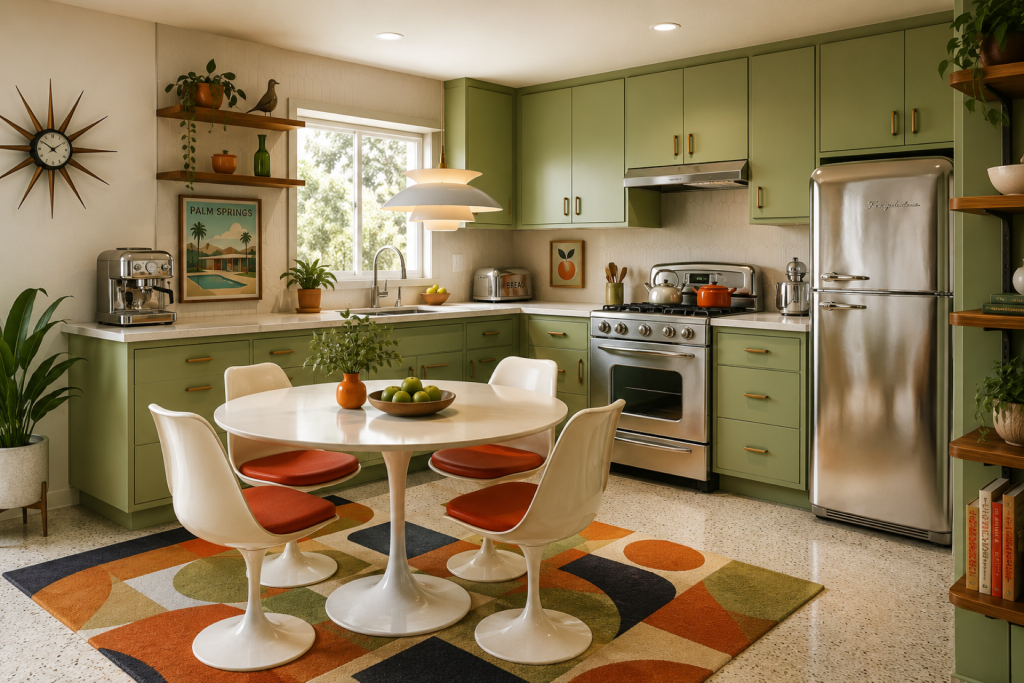
Mid-century modern (MCM) design brings retro flair with clean lines, organic curves, and bold accent colors. This sage green kitchen cabinet design channels the 1950s-60s with flat-panel doors, tapered legs, and iconic furniture pieces.
Key Features
- Cabinet Style: Flat-panel or slab doors with minimal detailing
- Hardware: Sleek horizontal pulls in brass or brushed nickel
- Appliances: Retro-style refrigerators and stoves (or wraps/panels)
- Furniture: Tulip table and chairs, sunburst clocks
- Flooring: Terrazzo or geometric-patterned linoleum/rug
DIY Budget Breakdown
| Item | Estimated Cost |
|---|---|
| Cabinet paint (sage green) | $80-120 |
| Retro-style hardware | $50-80 |
| Geometric area rug | $80-150 |
| MCM accessories (thrifted) | $30-60 |
| Total | $240-410 |
Pro Tips from Experience
Mid-century modern is all about geometry and optimism. I found an authentic sunburst clock at a flea market for $15, and it instantly anchored the retro vibe. For cabinets, choose a sage green with slightly more saturation than the modern contemporary style—something that feels intentional and cheerful rather than subdued.
Expert Tip: If replacing appliances isn’t feasible, consider appliance wraps or simply coordinate your small appliances (toasters, mixers, coffee makers) in retro colors like orange, cream, or turquoise. These pops of color against sage green create that quintessential MCM palette.
Paint Technique: For authentic MCM cabinets, use a high-gloss or semi-gloss finish. The slight sheen reflects light and emphasizes the clean, unadorned cabinet faces.
5. Boho Sage Green Kitchen
The Vision
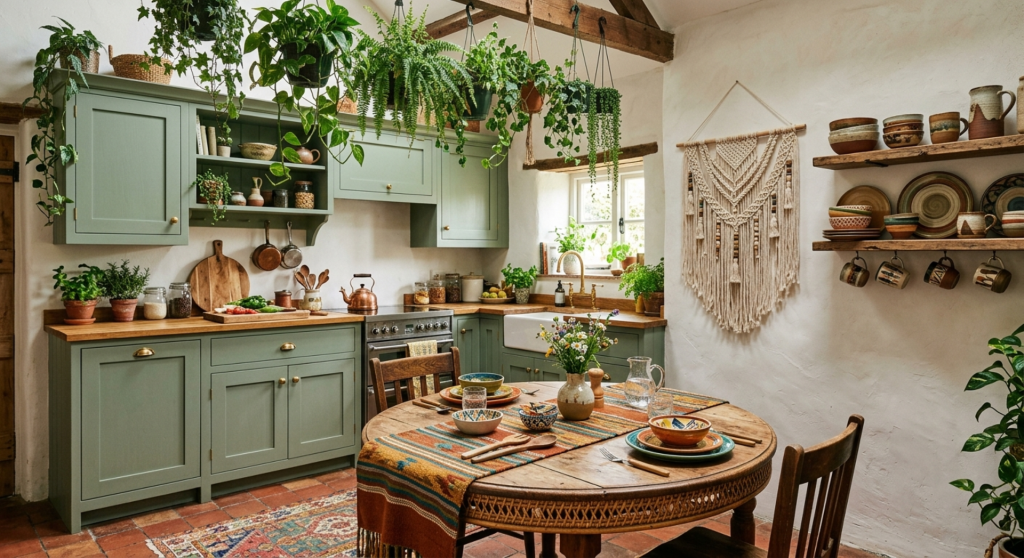
Bohemian style is eclectic, free-spirited, and deeply connected to nature. This sage green kitchen cabinet design overflows with plants, macramé, vintage ceramics, and global textiles. It’s a kitchen that feels collected over time rather than decorated.
Key Features
- Cabinet Style: Simple Shaker or flat-panel with mixed open shelving
- Plants: Hanging pothos, ferns, and trailing ivy (lots of them!)
- Textiles: Macramé wall hangings, kilim rugs, and woven baskets
- Displays: Open shelving with collected pottery, jars, and cookbooks
- Lighting: Natural light priority with warm, ambient fixtures
DIY Budget Breakdown
| Item | Estimated Cost |
|---|---|
| Cabinet paint (sage green) | $80-120 |
| Macramé wall hanging (DIY kit) | $20-40 |
| Plants (propagated + purchased) | $30-60 |
| Woven baskets & ceramics (thrifted) | $40-80 |
| Vintage rug | $50-100 |
| Total | $220-400 |
Pro Tips from Experience
The boho kitchen is the most budget-friendly because thrifting is the point. I built my collection over six months, visiting flea markets and plant swaps. The sage green cabinets provide a calm backdrop that allows your collected treasures to shine without competing.
Expert Tip: Propagate your plants! One pothos cutting becomes ten plants in a few months. Hang them in macramé holders made from $5 cotton cord. For the open shelving, install simple wooden brackets and stained pine boards—total cost around $40.
Color Recommendation: For boho style, choose a sage green with earthy, olive undertones. This connects better with natural wood, terracotta, and the warm metals often found in boho spaces.
How to Paint Kitchen Cabinets Like a Pro: A Step-by-Step Guide
After tackling multiple kitchen projects, here’s my trusted process for painting sage green kitchen cabinet units:
Phase 1: Preparation (Day 1)
- Remove everything: Doors, drawers, hardware, and hinges. Label each piece with painter’s tape.
- Clean thoroughly: Use a degreaser (TSP substitute works well) to remove years of cooking residue.
- Sand: Lightly sand all surfaces with 120-grit sandpaper. You don’t need to remove all finish—just scuff for adhesion.
- Fill holes: Use wood filler for any dings or old hardware holes if you’re changing placement.
- Prime: Apply a high-quality bonding primer. For laminate or glossy surfaces, use a shellac-based primer.
Phase 2: Painting (Days 2-3)
- First coat: Apply thin, even coats of sage green paint using a foam roller for flat surfaces and a quality brush for details.
- Sand between coats: Lightly sand with 220-grit sandpaper after each coat dries.
- Second (and third) coat: Most projects need 2-3 coats for full coverage. Patience here prevents regret later.
Phase 3: Finishing (Day 4)
- Seal: Apply a clear polyurethane topcoat for durability, especially on lower cabinets and drawers.
- Reassemble: Once fully cured (usually 3-5 days), reinstall hardware and hang doors.
Total Time Investment: 4-5 days of intermittent work.
Choosing the Right Shade of Sage Green
Not all sage greens are created equal. Here’s how to select the perfect sage green kitchen cabinet shade:
| Undertone | Best For | Paint Recommendations |
|---|---|---|
| Gray-sage | Modern, minimalist spaces | Benjamin Moore “October Mist” |
| Blue-sage | Coastal, cool-toned kitchens | Sherwin-Williams “Halcyon Green” |
| Yellow-sage | Warm, traditional kitchens | Farrow & Ball “Green Smoke” |
| Olive-sage | Rustic, boho, earthy spaces | Behr “Sage Wisdom” |
Pro Tip: Always test paint samples on your actual cabinets. Colors shift dramatically based on lighting, surrounding materials, and time of day. Paint a large swatch and live with it for 48 hours before committing.
Maintaining Your Sage Green Cabinets
To keep your DIY project looking fresh for years:
- Clean regularly: Wipe with a soft cloth and mild soap solution. Avoid abrasive cleaners.
- Touch up promptly: Keep leftover paint for quick fixes on chips or scratches.
- Control humidity: Excess moisture can damage paint over time. Use exhaust fans when cooking.
- Avoid direct sunlight: If your kitchen gets intense sun, consider UV-protective window film to prevent fading.
Final Thoughts: Your Dream Kitchen Is Within Reach
Transforming your kitchen with sage green kitchen cabinet paint is one of the most rewarding DIY projects you can undertake. Whether you’re drawn to the sleek sophistication of modern contemporary, the romantic charm of shabby chic, the rugged warmth of rustic, the retro optimism of mid-century modern, or the free-spirited energy of boho, there’s a sage green kitchen waiting for you.
As someone who has learned through trial, error, and eventual triumph, I can assure you: the satisfaction of walking into a kitchen you designed and painted yourself is unmatched. Start with a clear vision, invest in quality materials, take your time with prep work, and don’t be afraid to make it your own.
Your turn: Which style speaks to you? Share your sage green kitchen cabinet transformation in the comments below, or tag us on social media. I’d love to see what you create!
Frequently Asked Questions
Q: Can I paint laminate cabinets sage green? A: Absolutely! Use a bonding primer designed for laminate surfaces, and opt for a high-quality acrylic or alkyd paint. Proper prep is even more critical for laminate.
Q: How long does painted cabinet durability last? A: With proper prep, quality paint, and a protective topcoat, professionally painted cabinets can last 8-10 years. DIY projects typically last 5-8 years before needing refresh.
Q: Is sage green going out of style? A: While trends come and go, sage green has proven remarkably enduring due to its neutral, nature-inspired quality. It’s a classic rather than a fleeting fad.
Q: What’s the cheapest way to update hardware? A: Spray paint your existing hardware! Brass, black, and oil-rubbed bronze spray paints can transform dated handles for under $10.

Leave a Reply