Designing a bedroom for a teenage girl in a small space can feel like solving a puzzle with too many pieces. Between clothes, school supplies, hobbies, and the need for a cozy retreat, every square inch matters. As someone who has spent years exploring home design solutions and testing real-world DIY projects, I’ve learned that the key to a successful small teen girl bedroom isn’t about having more space—it’s about using the space you have smarter.
In this guide, I’ll walk you through four proven DIY projects that transform cramped quarters into functional, Instagram-worthy sanctuaries. These ideas aren’t just Pinterest dreams—they’re practical, budget-friendly solutions that real teens can actually build and maintain. Whether you’re a parent helping your daughter redesign her room or a teen looking for weekend projects, these small teen girl bedroom ideas will give you the inspiration and actionable steps you need.
1. Floating Pegboard Organizer & Study Nook
Why This Works for Small Spaces
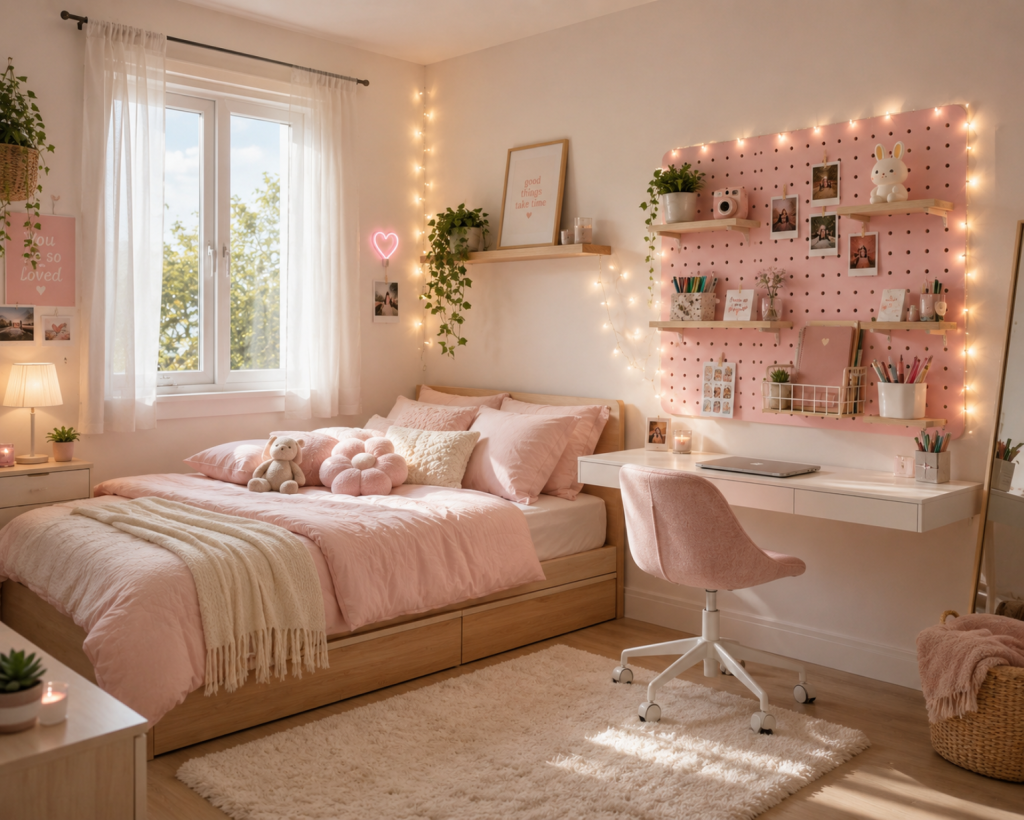
When floor space is limited, the only way to go is up. A floating pegboard organizer turns an empty wall into a multi-functional command center for studying, displaying memories, and storing everyday essentials. Unlike bulky bookcases or cabinets, a pegboard system keeps everything visible and within arm’s reach without consuming precious floor real estate.
Materials You’ll Need
- 1 large pegboard panel (4×4 feet or custom-cut to fit your wall)
- Wooden dowels or metal pegboard hooks
- 3-4 small floating shelves
- Fairy lights (warm white)
- Small wire baskets and hooks
- Command strips or wall anchors for mounting
- Paint or contact paper (optional, for color customization)
Step-by-Step DIY Guide
Step 1: Measure and Plan Before purchasing anything, measure the wall space above or beside your desk area. Sketch a rough layout of where you want shelves, hooks, and decorative elements. The beauty of pegboard is its flexibility—you can rearrange components as needs change.
Step 2: Mount the Pegboard Use a stud finder to locate wall studs for secure mounting. If studs aren’t available where you need them, use heavy-duty wall anchors rated for at least 50 pounds. The pegboard should sit flush against the wall with no wobbling.
Step 3: Install Floating Shelves Attach 2-3 small wooden floating shelves at varying heights. These are perfect for displaying small plants, framed quotes, or a mini Polaroid camera collection. Keep the heaviest items on the lowest shelf for stability.
Step 4: Add Functional Accessories Insert pegboard hooks to hang headphones, lanyards, or lightweight bags. Wire baskets can hold stationery, washi tape, or phone chargers. The key is mixing functional storage with decorative elements so the wall feels personal, not utilitarian.
Step 5: Layer in Lighting String warm fairy lights around the pegboard perimeter. Not only does this create a cozy ambiance for late-night studying, but it also draws the eye upward, making the ceiling feel higher and the room feel larger.
Pro Tips from Experience
- Color-coordinate your storage: Matching baskets and containers in 2-3 complementary colors keeps the display looking intentional rather than cluttered.
- Leave breathing room: Resist the urge to fill every hole. Negative space is essential in small rooms.
- Rotate seasonally: Swap out photos, quotes, and small decor items every few months to keep the space feeling fresh without buying new furniture.
2. Under-Bed Storage Boxes with Custom Fabric Trim
Why This Works for Small Spaces
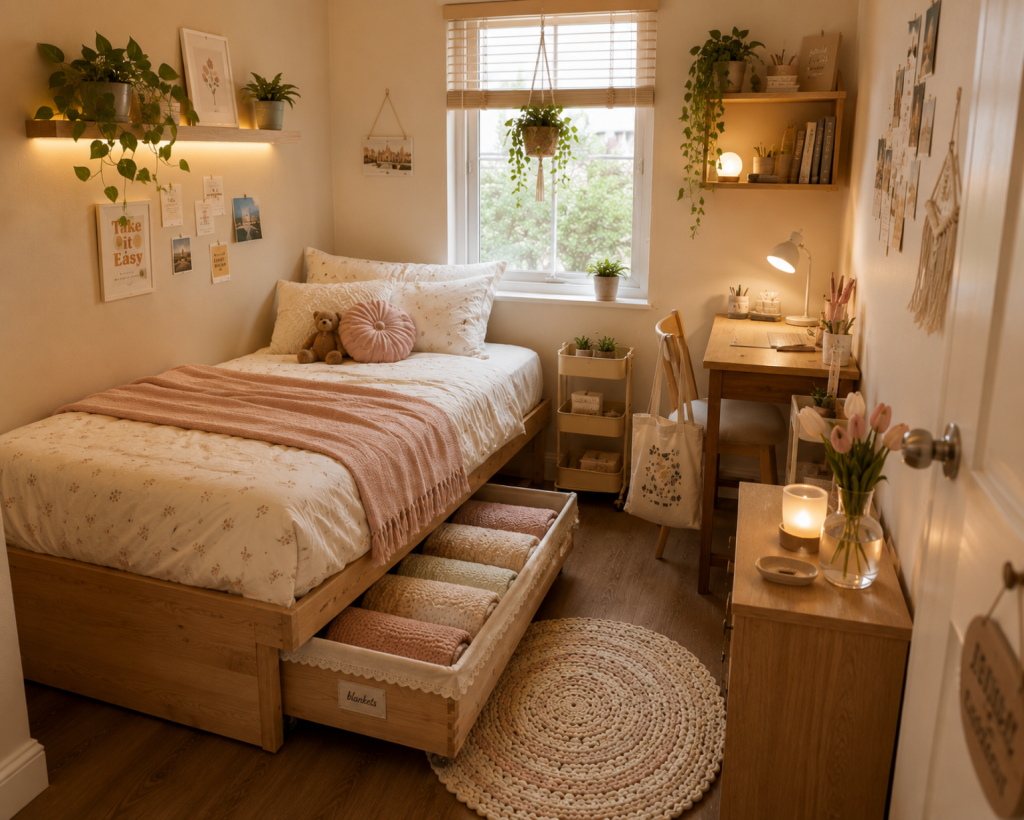
The area under a bed is prime real estate that most people waste. Standard plastic storage bins work, but they look cheap and often don’t fit perfectly. Custom DIY under-bed storage boxes with fabric trim solve both problems: they maximize every inch of under-bed space while adding a polished, boutique-hotel aesthetic that elevates the entire room.
Materials You’ll Need
- 2-3 wooden or MDF under-bed drawer boxes (or repurpose old dresser drawers)
- Casters/wheels (4 per box)
- Fabric of choice (linen, cotton, or canvas work best)
- Hot glue gun and glue sticks
- Lace trim or ribbon
- Label tags or small chalkboard labels
- Sandpaper and wood stain or paint (optional)
Step-by-Step DIY Guide
Step 1: Source or Build Your Boxes If you’re handy with tools, build simple rectangular boxes from plywood or MDF cut to your bed’s dimensions. For an easier route, repurpose old dresser drawers from a thrift store or Facebook Marketplace find. Just ensure they’re no taller than 8-10 inches to slide easily under the bed.
Step 2: Add Mobility Screw heavy-duty casters onto each corner of the box bottom. Choose locking casters if your floors are uneven. Test the roll before loading—nothing ruins the experience like a drawer that sticks.
Step 3: Apply Fabric Trim Cut fabric panels to wrap around the exterior sides of each box. Use a hot glue gun to attach the fabric smoothly, pulling taut as you go. For a more finished look, fold raw edges under before gluing. This is where you can match the room’s color scheme—blush pink, sage green, or cream linen all work beautifully.
Step 4: Add Decorative Details Glue lace trim along the top edge of the fabric for a cottagecore or shabby-chic vibe. Attach small label tags (like “blankets,” “shoes,” or “memories”) so everything has a designated home.
Step 5: Organize and Slide Roll seasonal clothing, extra bedding, or shoe organizers into the boxes. The casters make retrieval effortless, and the fabric exterior means you won’t mind if a corner peeks out from under the bed skirt.
Pro Tips from Experience
- Measure twice, build once: Bed frames vary wildly in clearance. Measure from floor to bed frame rail before buying materials.
- Use vacuum bags inside: For bulky items like winter coats or comforters, store them in vacuum-sealed bags inside the boxes to triple your storage capacity.
- Make it a weekend project: This is an ideal mother-daughter DIY. The fabric selection and trim application are fun, low-stress tasks perfect for bonding.
3. Hanging Rope Wall Shelves
Why This Works for Small Spaces
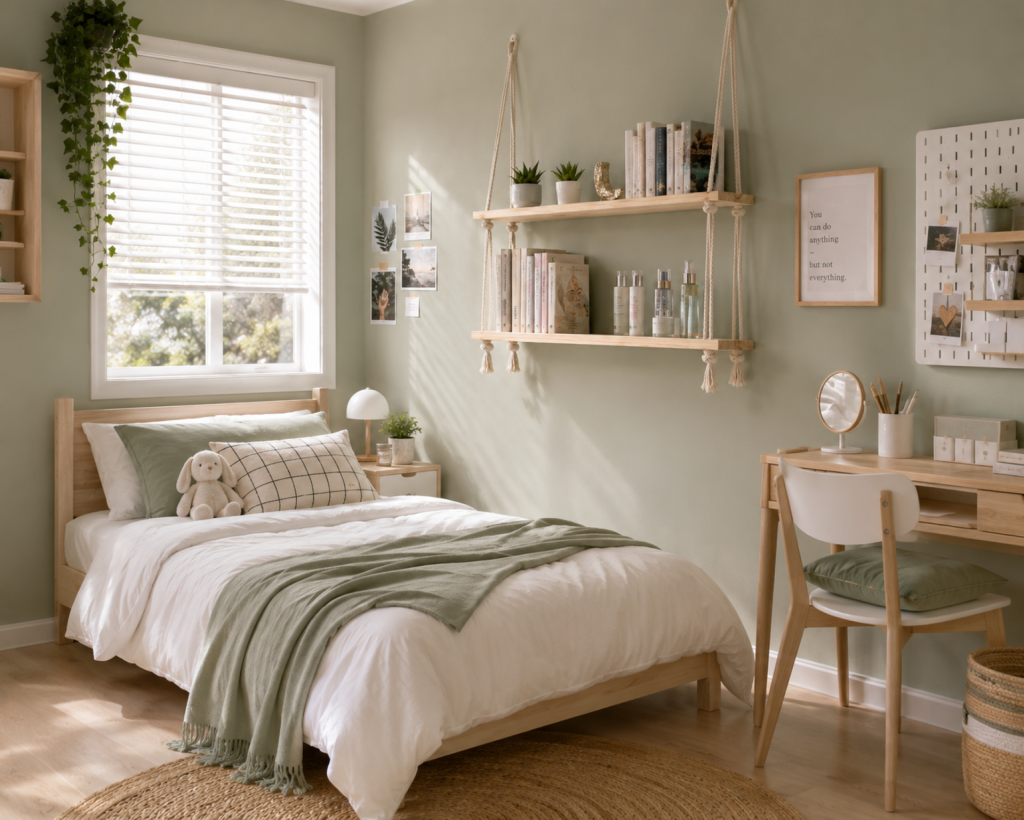
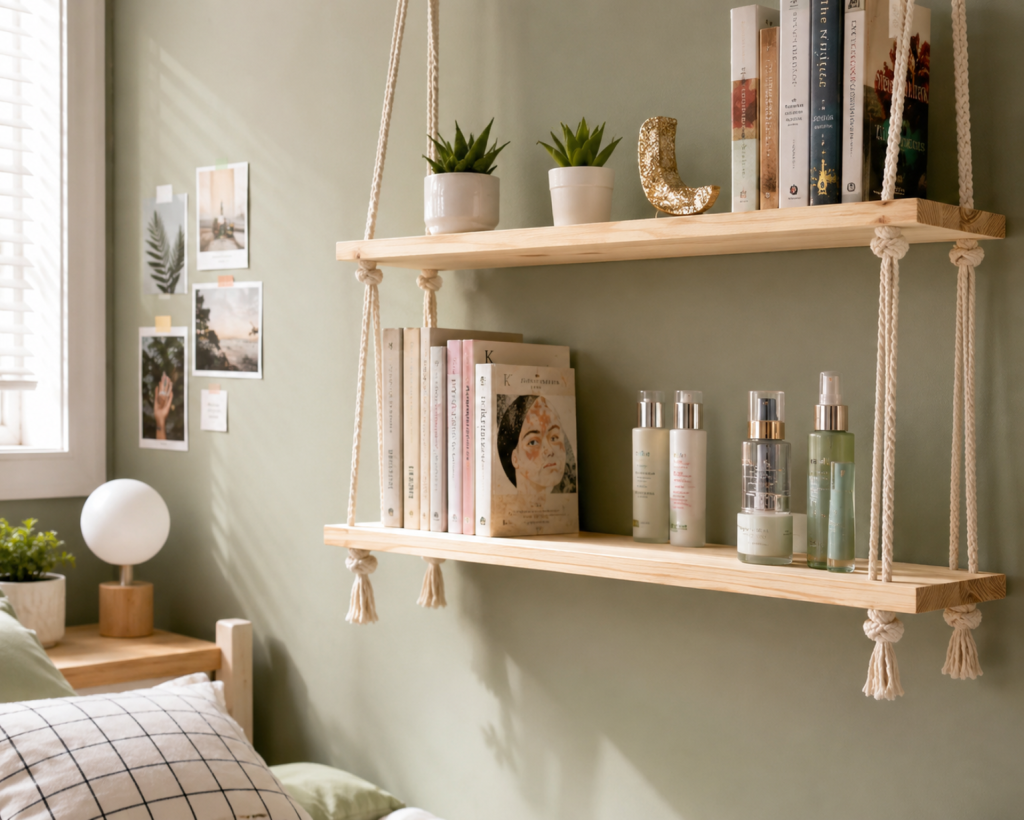
Traditional bookcases eat up floor space and can make a small room feel boxed in. Hanging rope shelves, inspired by bohemian and Scandinavian design, create vertical storage without the visual weight of furniture. They draw the eye upward, making ceilings appear higher, and their airy design prevents the room from feeling cramped.
Materials You’ll Need
- 2-3 wooden planks (1×6 or 1×8, cut to desired length)
- Natural cotton or jute rope (⅜ inch thickness)
- Ceiling hooks or heavy-duty wall anchors
- Drill and drill bits
- Sandpaper and wood finish (stain, paint, or clear sealant)
- Level
Step-by-Step DIY Guide
Step 1: Prepare the Shelves Sand the wooden planks until smooth, rounding the edges slightly. Apply your chosen finish—natural wood stain complements boho and cottagecore aesthetics, while white or sage paint fits modern minimalist rooms. Let dry completely.
Step 2: Drill Rope Holes Measure and mark four holes per shelf, positioned about 2 inches from each corner. Drill holes slightly larger than your rope diameter to allow easy threading. Sand the hole edges to prevent rope fraying.
Step 3: Cut and Thread Rope Cut four equal lengths of rope per shelf. The length depends on your ceiling height and desired shelf spacing, but 6-8 feet is a good starting point. Thread each rope through the holes, tying secure knots beneath each shelf to hold them in place. Use a level to ensure shelves sit flat.
Step 4: Install Ceiling Anchors Locate ceiling joists using a stud finder, or use toggle bolts rated for at least 75 pounds if joists aren’t aligned with your desired placement. Screw in sturdy ceiling hooks and attach the rope ends with secure knots or carabiners for easy removal.
Step 5: Style with Intention These shelves aren’t for heavy textbooks—save those for the desk. Instead, display lightweight items: small potted succulents, perfume bottles, jewelry dishes, or a curated stack of favorite paperbacks. The visual lightness is the whole point.
Pro Tips from Experience
- Test weight limits carefully: Before loading shelves, gradually add weight and monitor for sagging. These are display shelves, not storage workhorses.
- Add tassels or beads: Thread wooden beads or create simple tassels at rope ends for extra boho flair.
- Consider a wall-mounted version: If ceiling installation isn’t possible, mount heavy-duty hooks high on the wall and suspend shelves from there instead.
4. Bunk Bed “Cottagecore” Headboard Shelf
Why This Works for Small Spaces
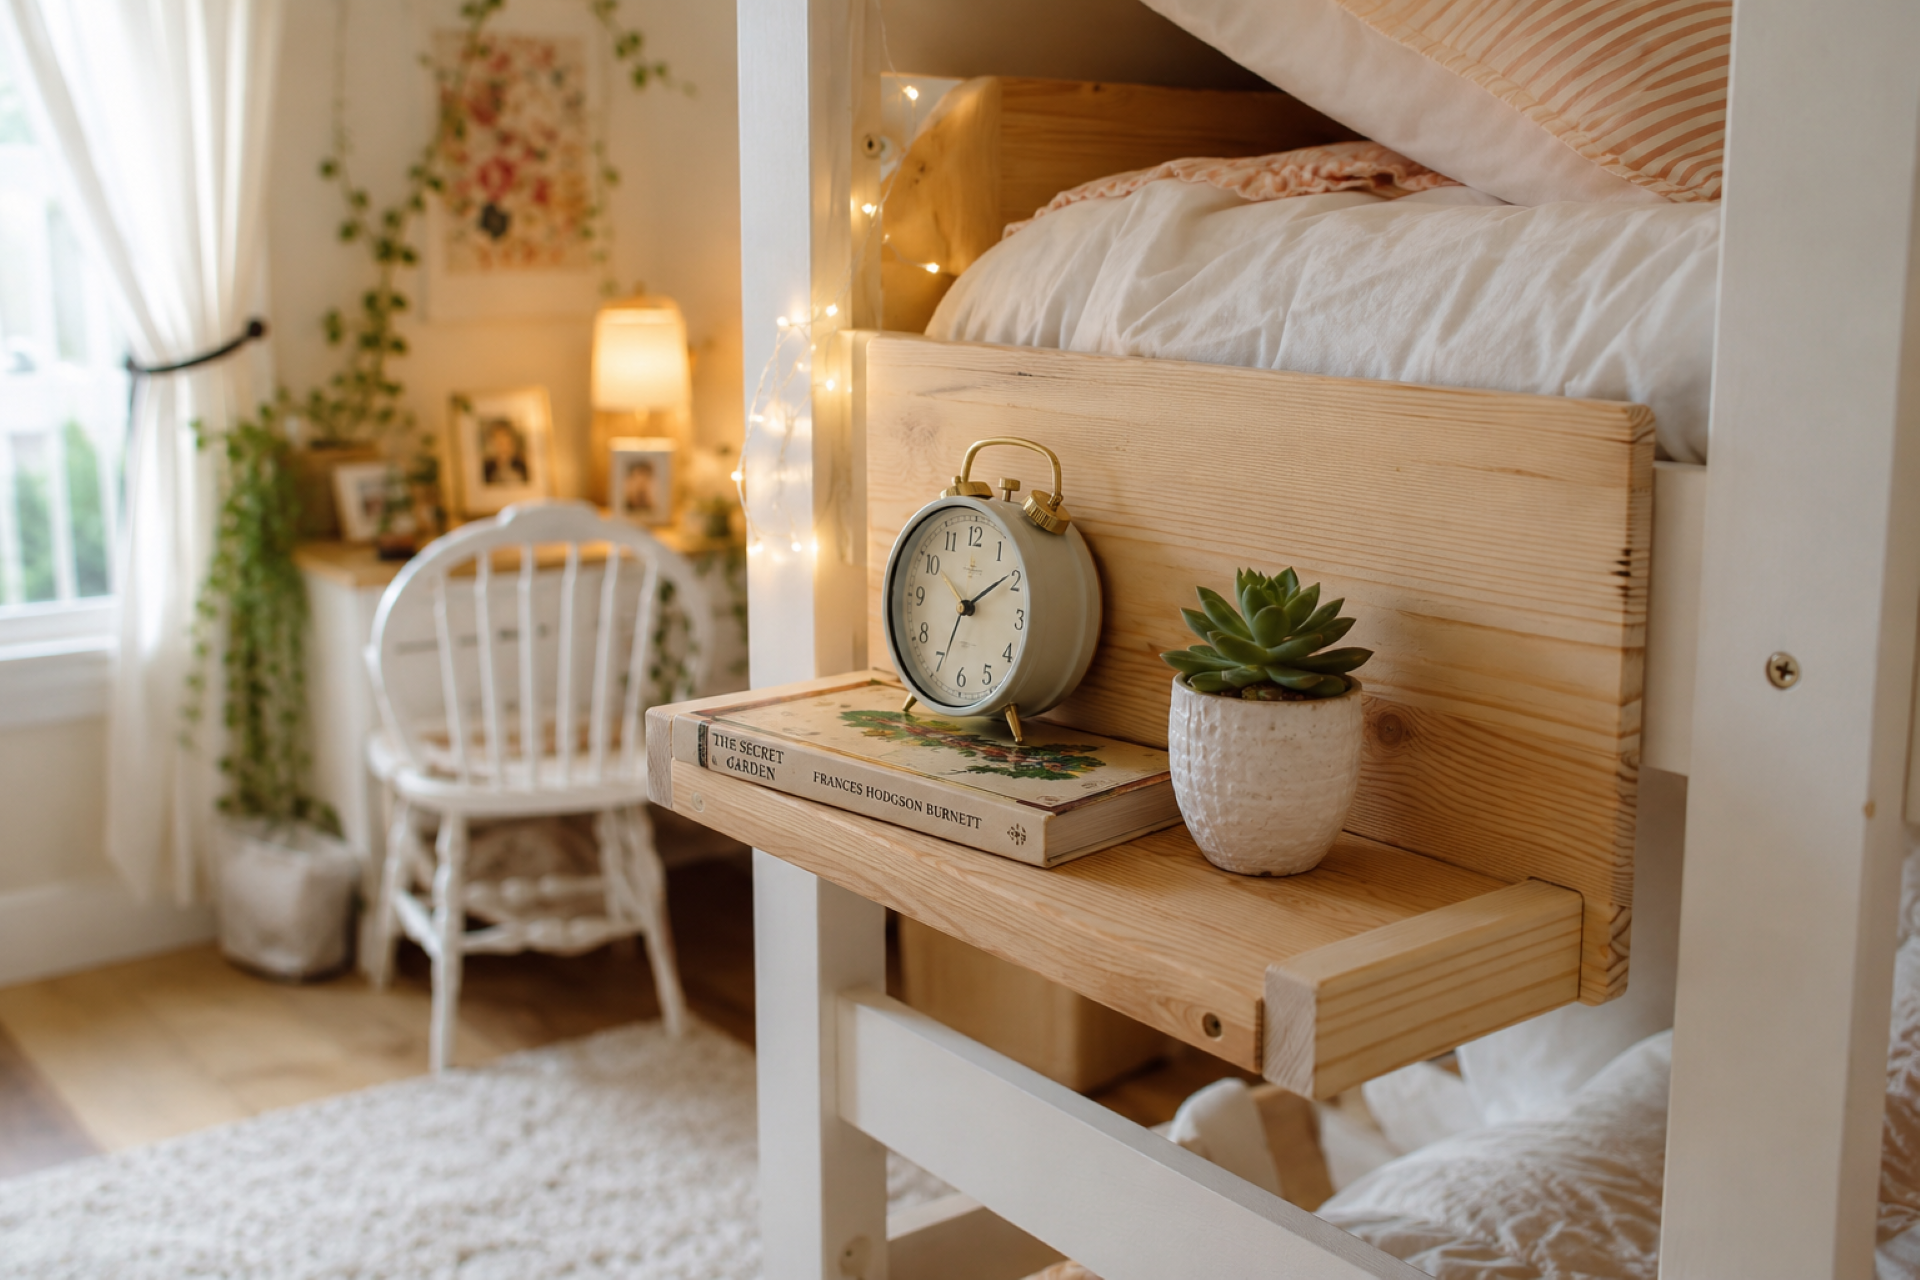
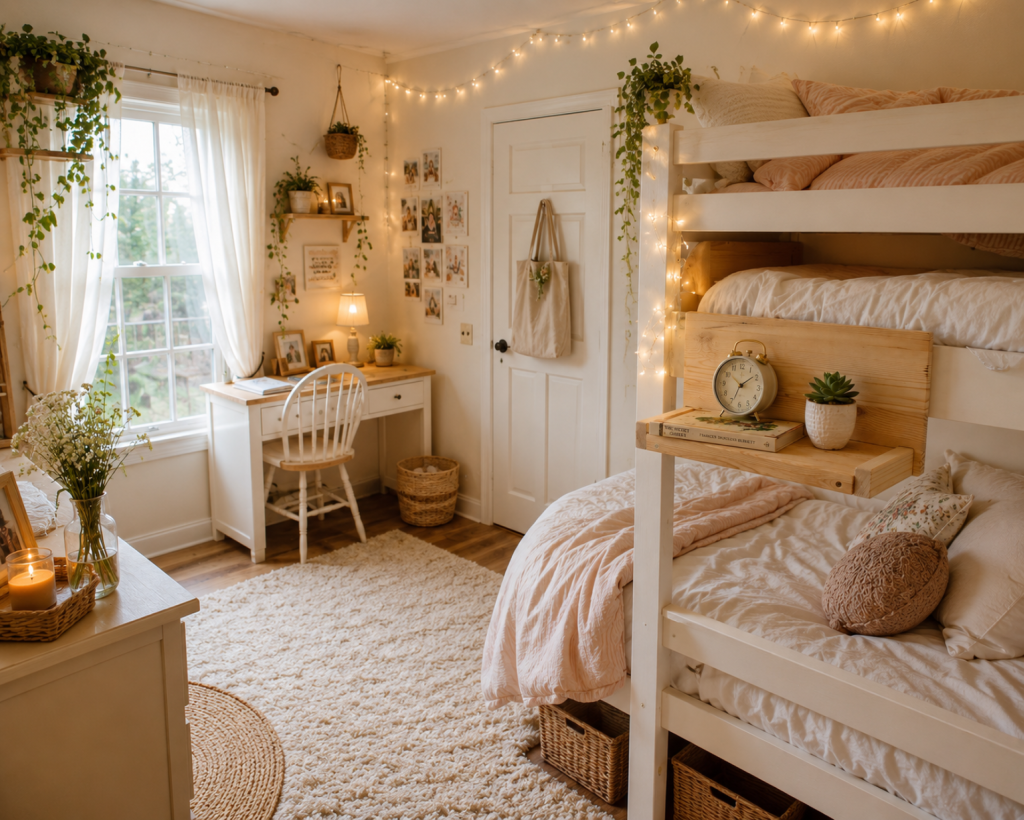
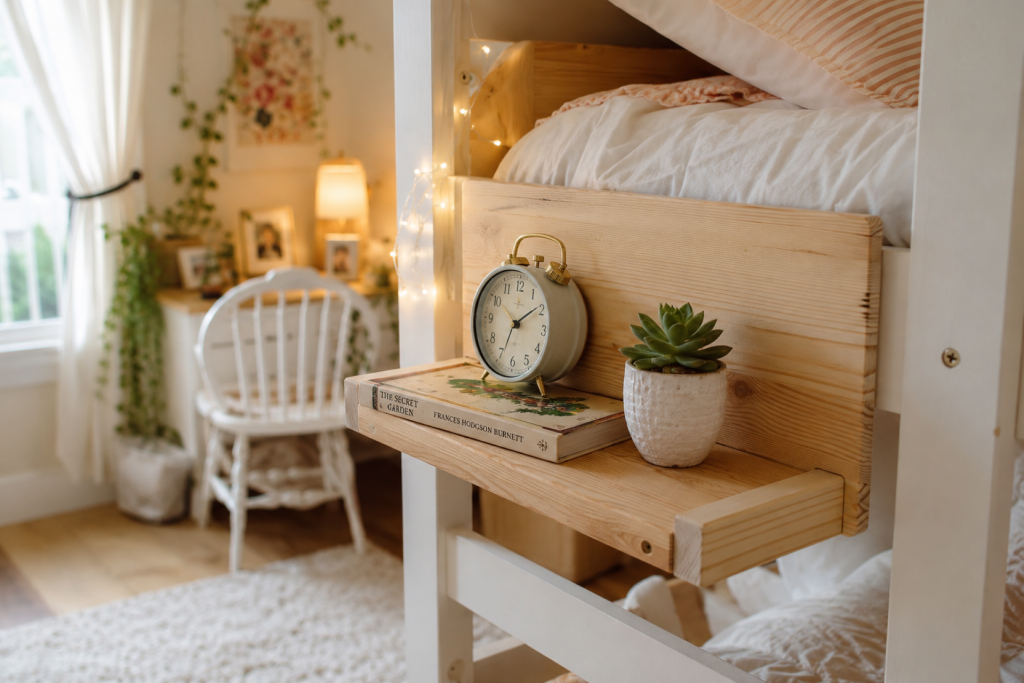
For teens sharing a room or maximizing vertical space, bunk beds are a practical necessity—but they don’t have to look institutional. A custom headboard shelf attached to the bunk bed frame creates a personal nightstand alternative that requires zero floor space. It’s the perfect spot for an alarm clock, bedtime book, or small plant, and it adds that coveted cottagecore warmth that makes a bedroom feel like a retreat.
Materials You’ll Need
- 1 wooden plank (1×8 or 1×10, length matching bunk bed width)
- 2 wooden brackets or L-brackets
- Wood screws (appropriate for your bed frame material)
- Drill and screwdriver
- Wood stain or paint
- Small decorative items (clock, book, mini plant, fairy lights)
Step-by-Step DIY Guide
Step 1: Measure the Bunk Bed Frame Measure the width between the bunk bed posts where you want the shelf. The shelf should sit at a comfortable height for the sleeper—typically just above pillow level when sitting up in bed.
Step 2: Cut and Finish the Shelf Cut your plank to the measured width. Sand thoroughly and apply stain or paint. For a cottagecore aesthetic, light oak or whitewashed finishes work beautifully. Let dry completely.
Step 3: Attach Brackets Secure L-brackets to the underside of the shelf plank, positioned to align with the bunk bed frame posts or side rails. Pre-drill holes to prevent wood splitting.
Step 4: Mount to Bunk Bed Hold the shelf in position and mark where brackets meet the bed frame. Drill pilot holes and secure with wood screws. Double-check that the shelf is level and can support at least 10-15 pounds.
Step 5: Style the Shelf This is where personality shines. Add a small vintage-style alarm clock, a stack of favorite books, a mini succulent in a ceramic pot, and a string of battery-operated fairy lights tucked behind the books. The goal is cozy functionality—everything within arm’s reach for bedtime routines.
Pro Tips from Experience
- Safety first: Never overload the shelf. Keep items lightweight and secure. Avoid glass or heavy ceramics that could fall during sleep.
- Use command hooks for lights: Instead of drilling more holes, use small command hooks to drape fairy lights around the bunk bed frame.
- Make it reversible: If you’re renting or might rearrange, use removable brackets that can be unscrewed without damaging the bed frame.
Bringing It All Together: Design Principles for Small Teen Girl Bedrooms
After implementing these four DIY projects, keep these overarching principles in mind to maintain a cohesive, spacious feel:
Stick to a Unified Color Palette
Choose 2-3 main colors and repeat them throughout textiles, storage, and decor. In the rooms shown, blush pink/cream, sage green/natural wood, and warm white/gold create calm, intentional spaces rather than visual chaos.
Prioritize Multi-Functional Furniture
Every piece should earn its keep. A desk that doubles as a vanity, a storage ottoman, or a bed with built-in drawers maximizes utility without adding bulk.
Embrace Vertical Storage
Walls are your best friend in small rooms. Floating shelves, pegboards, hanging organizers, and over-door hooks keep floors clear and sightlines open.
Let There Be (Layered) Light
A single overhead light flattens small rooms and creates harsh shadows. Layer ambient light (fairy lights, table lamps, window light) to add depth and warmth.
Edit Ruthlessly
Teens accumulate stuff quickly. Implement a monthly “keep or donate” ritual. If an item hasn’t been used in three months and doesn’t spark joy, it’s taking up space better used for something meaningful.
Final Thoughts
Small bedrooms don’t have to mean small dreams. With a bit of creativity, some weekend DIY energy, and smart space planning, any tiny room can become a personalized sanctuary that reflects a teen’s unique style while keeping clutter at bay.
These small teen girl bedroom ideas prove that constraints breed creativity. Whether you build a floating pegboard command center, craft custom under-bed storage, suspend airy rope shelves, or add a cottagecore touch to a bunk bed, each project adds function and personality.
Start with one project this weekend. Take before-and-after photos. Share your progress. Most importantly, have fun making a space that feels truly, wonderfully hers.

Leave a Reply